As you can imagine, being a family photographer means I’m constantly taking pictures of my own family. Up til now, those pictures mostly lived on my hard drive and made an appearance in our annual family yearbook. But I dreamed of the day when I’d have my own space and finally be able to display our family pictures in our home where we could see them every day. Well, we bought our home last year and I’ve been on the lookout for the best way and place for a gallery wall in our home. After much Pinterest research, I landed on an oversized mat gallery wall, and in this blog post I’m going to share all the ups and downs of this DIY.
My Requirements
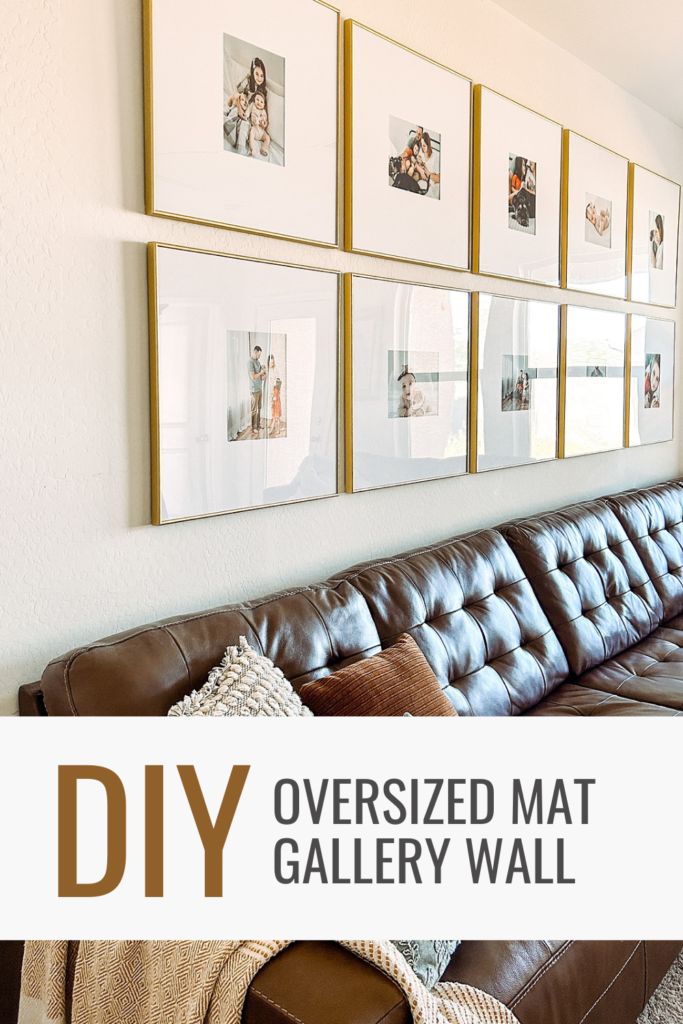
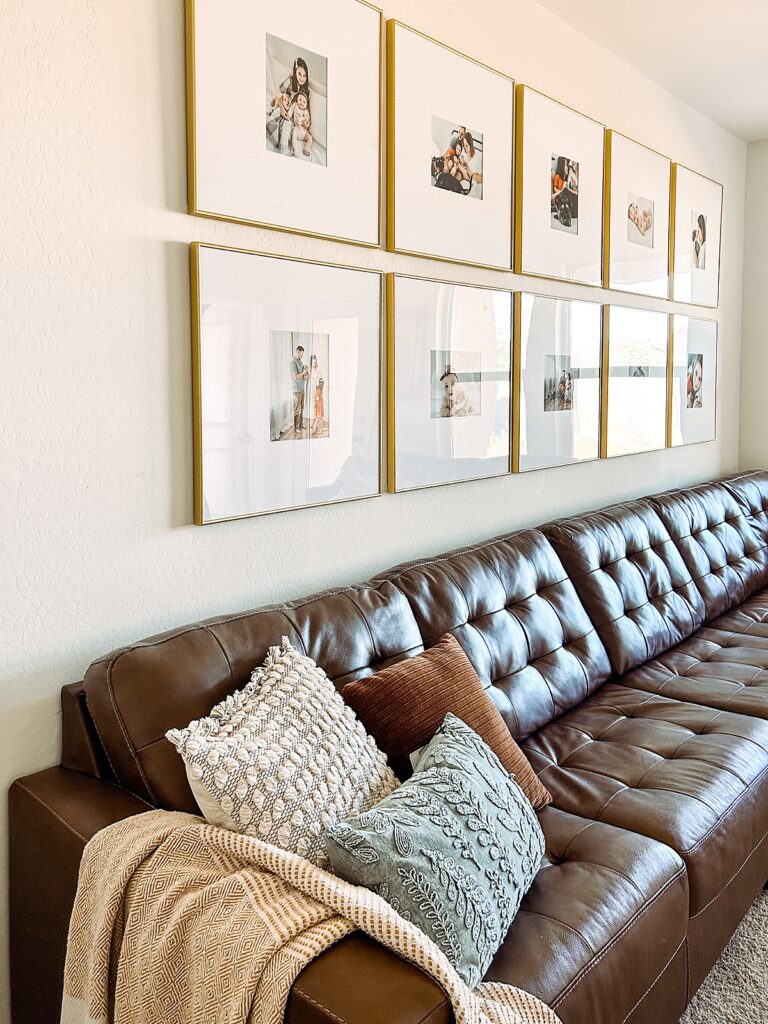
Because of the layout of our home the best (and honestly only) configuration of furniture in our family room was a sectional that ran the length of our back wall, we’re talking almost 15 feet. We found the perfect couch but it seemed to highlight the now empty and vast expanse of wall above it. That’s when I knew I’d found the perfect place for my dream gallery wall.
I initially thought I might do a picture ledge, something I could layer lots of different-sized frames on, but I immediately became overwhelmed with the styling and limitations. What if one year my favorite family picture was a portrait orientation and the next it was landscape? I’d have to switch up everything and maybe even frames to keep the balance. Pass.
So I came up with a list of what I wanted in a gallery wall.
- Timeless – It had to look good now and in 10 years. I didn’t want to look back and wonder what the heck I was thinking and cringe at my sad attempt at interior design. (Despite my creative and artistic sensibilities as a photographer… they don’t translate easily to interior design.)
- Versatile – I wanted to be able to switch pictures out easily, with different orientations, without throwing off the design or requiring new frames.
- Convenient – We recently bought a new printer and it prints amazing, photo-quality images. Its only limitation is it can only print photos up to 8.5″x11″, so that’s the size I wanted my photos to be so I didn’t have to order through a 3rd party.
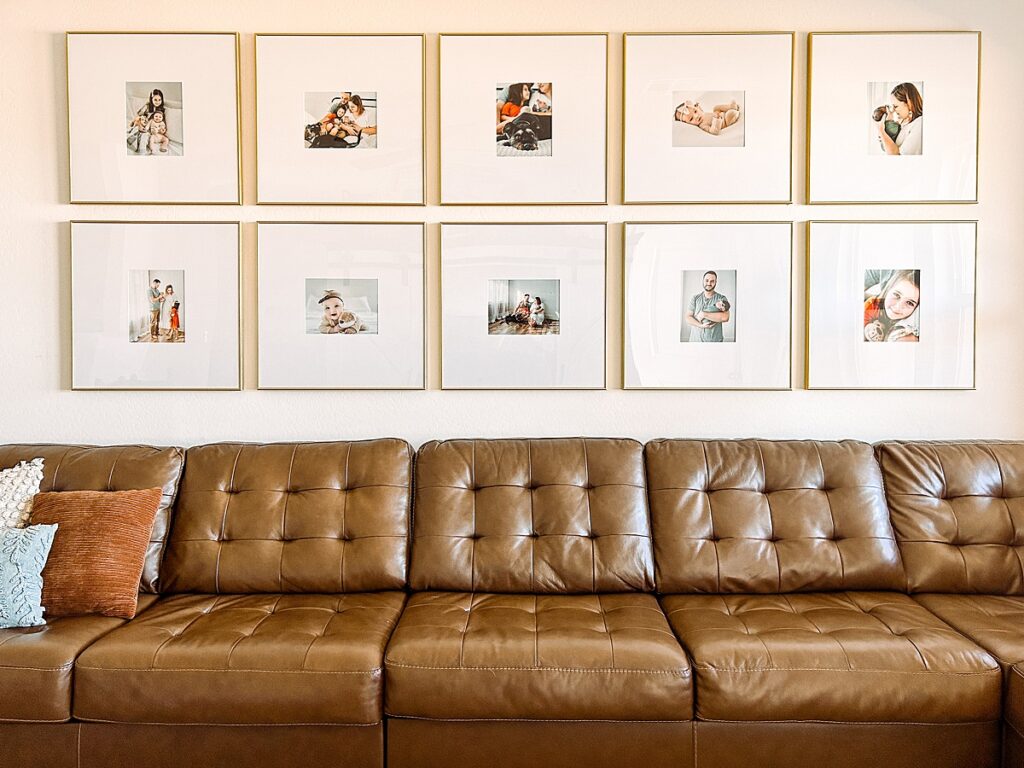
With these things in mind, I went back to Pinterest and found the perfect solution. A DIY oversized mat gallery wall in a grid.
Why I love it (& it works!)
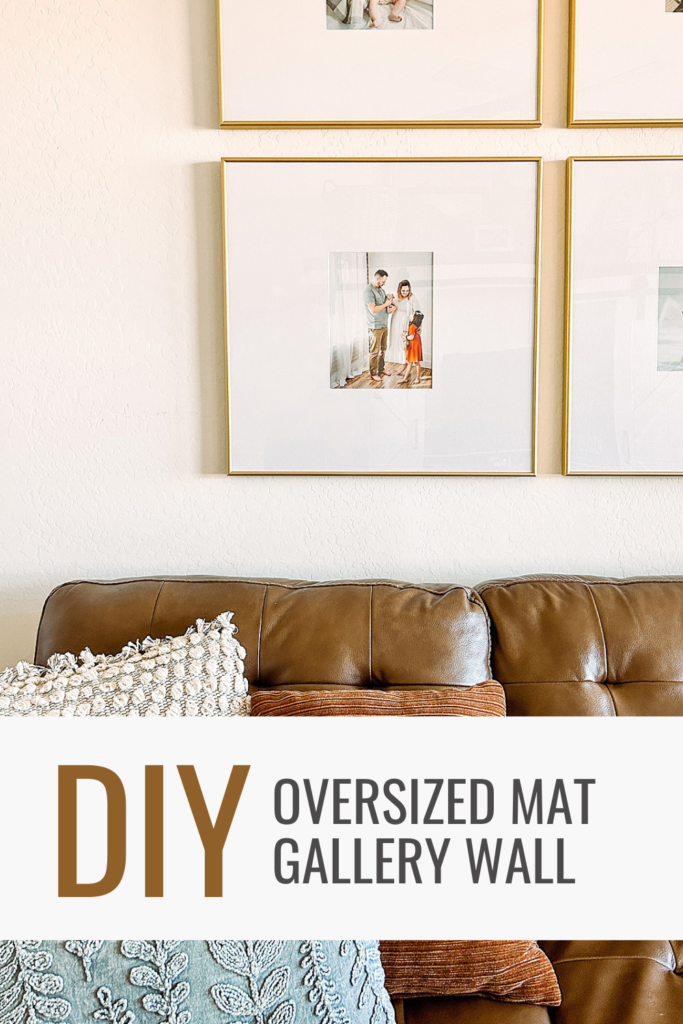
Once I’d done my research I realized that the oversized mat checked every box. They’re timeless, immediately making your pictures feel like fine art hung in a museum. The oversized mat set in a square frame also meant that I could mix orientations and it would still feel uniform. And finally, if I could find the right frames and mats I’d be able to print at home.
The search for the perfect frame
Then came the hard part, finding the perfect frame. I loved the idea of a gold frame, though I had to talk my hubby into it first. Though it’s made a comeback in home decor recently, in his head it’s still the shiny, gaudy stain of outdated homes. Once I showed him a picture or two he came around. But finding affordable metal frames was SOOOO much harder than I thought it would be.
After taking measurements and creating a mockup in photoshop I decided that ten, 25″ square frames with an 8.5″x11″ mat opening would perfectly fill the wall above my couch.
What does affordable even mean?
Now real quick I want to talk about the word “affordable.” I searched high and low on Pinterest for ways to DIY this look for cheap and you know what I found… this really isn’t something you can fake. Or if it is, I didn’t find it. Sure, people build their own frames (usually wood, not metal), and you can cut your own mats… but like many DIY projects… the jury is out on whether or not it’s actually cheaper in the long run.
So what do I mean by affordable?
Well, affordable is an arbitrary measure that is different for every person. If I’ve learned anything as a small business owner it’s that people can almost always find the money for the things that are important to them. And this… this was important to me. In fact, I’ve written a whole blog post about why pictures are important and especially why it’s important to hang them on your walls. I was going to find a way to do this no matter what, so affordable to me, in this context, means it was the best deal, for the best quality, to achieve the look I wanted.
And I found Frame It Easy.
Why I chose Frame it Easy
I have to include a little caveat here. When I decided on using Frame It Easy I reached out to them to see if they would partner with me on this project and blog post and they agreed, so I did get a bit of a discount in exchange for this review. BUT! I was going to use them and write this blog post anyways so for me it was just an extra cherry on top. Plus BONUS! Now I have a discount code for you for Frame It Easy at the end of this post. 😀
So here’s why I chose to go with Frame It Easy for my frames:
- Style – They had exactly what I wanted! Beautiful modern gold/brass colored frames available in any size I wanted.
- Price – I got each frame and mat set for about $82. The next best comparable frame and mat I found were from Pottery Barn and more than three times the price!
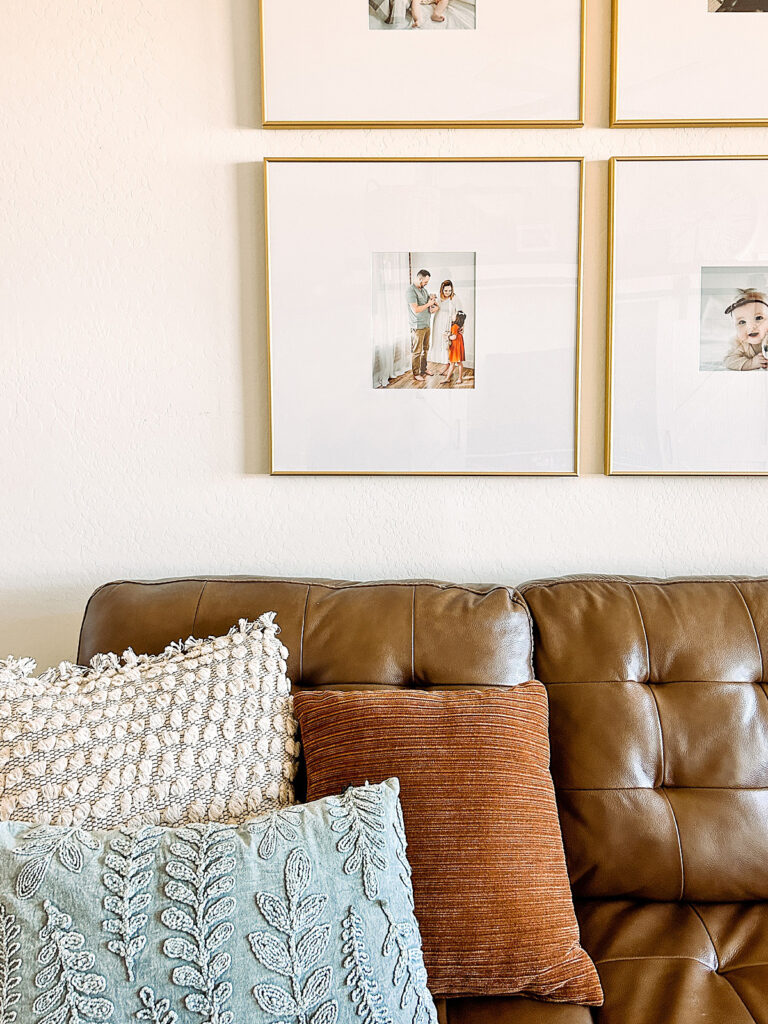
- Customizable Mat – Many square frames come with mats that have square openings… and I honestly HATE pictures with a square crop. As an artist, it almost always defeats the careful composition of the image and it drives me crazy! I loved that with Frame It Easy the mats were as easy to customize as the frames.
BONUS! They shipped fast, everything is made in the USA, and ALL of their packaging was recyclable.
Frame It Easy Review
As much as I love and appreciate the convenience of online shopping, I prefer being able to touch and hold something before I buy it. I still regularly get a 6 oz package of shredded cheese instead of the 16 oz I meant to order for grocery pickup because it’s so easy to miss those little details when shopping online. So the question is… did Frame It Easy live up to my expectations?
Easy answer. YES! YES! YES!
A Few of my favorite things
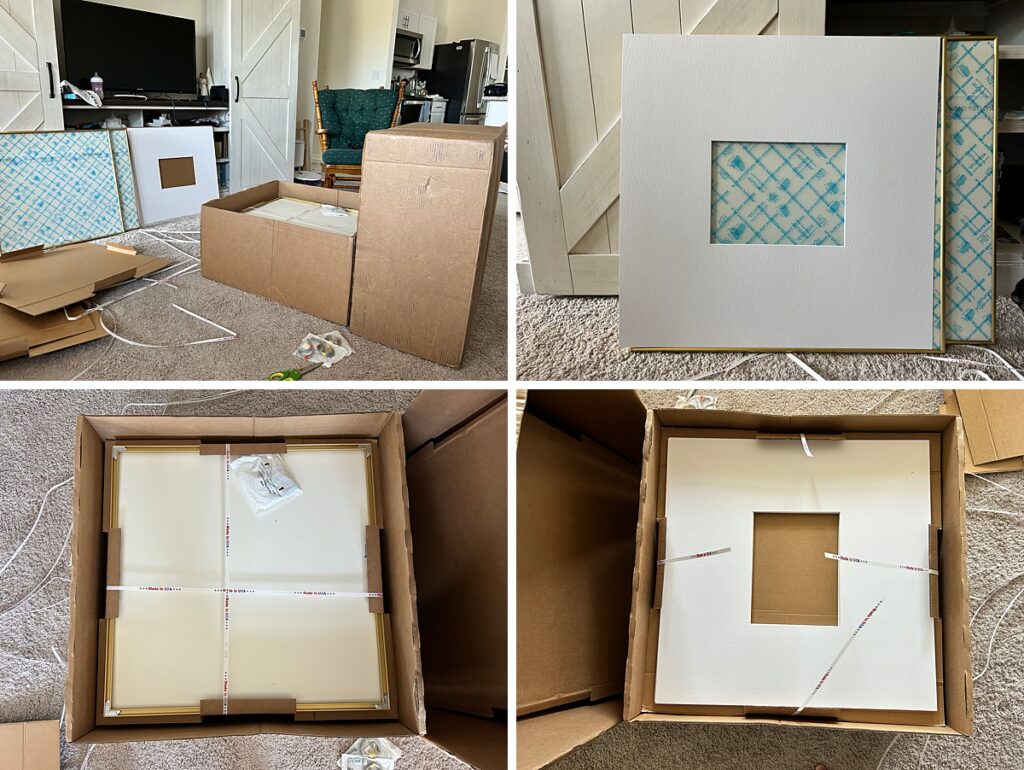
Here are a few of my thoughts and observations as I unboxed my frames.
- Environmentally Friendly Packaging – As I already mentioned they shipped fast and their shipping materials were impeccable. Everything was packaged thoughtfully so it was well protected but there weren’t any wasted or unnecessary materials. And what they did use was all 100% recyclable.
- Flexible Acrylic – I got the clear acrylic in my frames and was a little surprised to find that it was flexible. I wasn’t sure how I felt about it initially but ended up enjoying that it wasn’t too fragile, otherwise I probably would’ve broken at least one. They arrived with a protective film on both sides to guard against scratches during transit.
- Beautiful, Modern, Gold Color – I was super nervous about the color since my hubby was skeptical about the gold. I’m happy to report that it’s GORGEOUS, totally on-trend, and timeless.
- Functional – The frames are essentially built with four square, hollow. metal rods connected with 4 corner pieces. This means you could completely dismantle the frame if needed for super compact storage. The way you get the picture in is to slide off the bottom rod, slide your mat and image into the groove, then reattach the bottom rod. It’s a little inconvenient because of how big my frames are (you need a full 50″ of space to get pictures in and out), but it works so no complaints and I imagine it will hold up very well over the years.
The hardest part
Okay… so now I have my frames, I printed my pictures and assembled everything. Now the super fun part, getting everything on the wall!
Turns out, also the hardest part. Mistakes were made. And to be honest, while I’m writing this I still haven’t solved this problem and one of my frames just fell off the wall. So I’ve still got work to do… but lucky you! I made the mistakes so you don’t have to! Keep reading to find out what didn’t work and I promise to update you when I finally get a permanent solution.
First attempt: Drywall Anchors/Screws
My first plan was to use drywall anchors and screws. I followed the instructions in this post by Darling Darlene to map out exactly where I’d need my screws. I used a 4ft level and measuring tape to measure, and mark. And then I got really excited and drilled.
Here’s a tip for using drywall anchors. If you try to screw the anchor directly into the drywall it will often break so you need to pre-drill your holes. A little tip from my Father-In-Law, use the Phillips driver to drill the hole first, then drill in the anchor, and finally the screw. The Phillips head makes the perfect hole, much easier than trying to gauge the right size drill bit.
What went wrong?
First, my measuring and leveling were off… even if I’d gotten everything else right, nothing was going to line up.
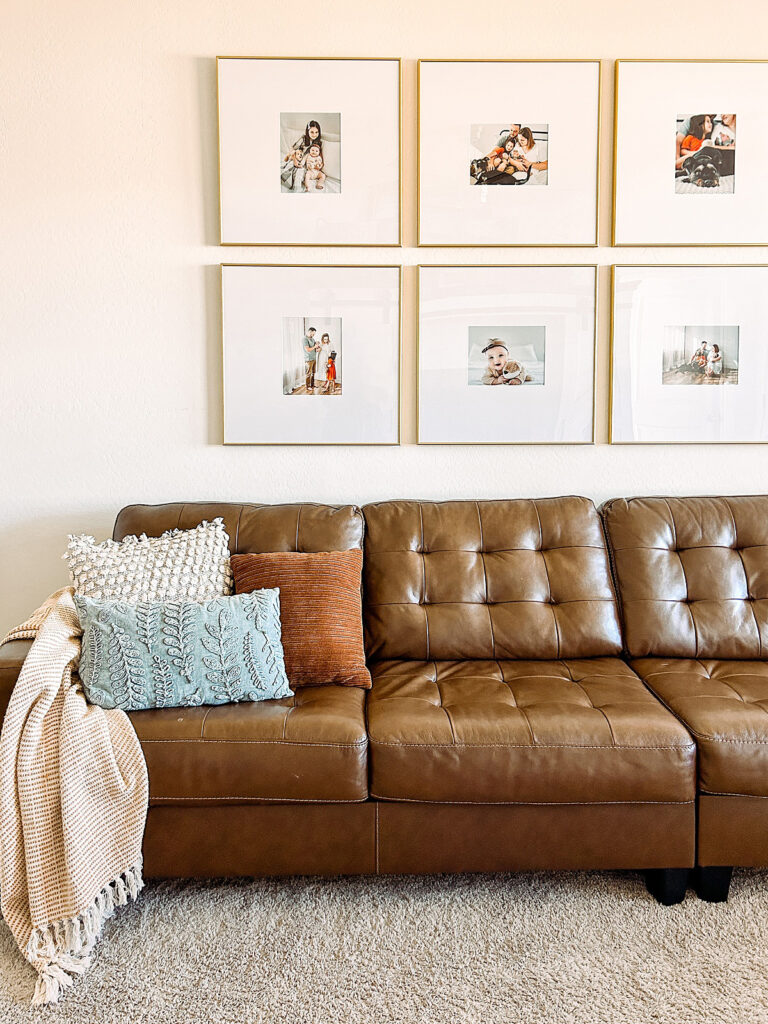
Even just getting everything up imperfectly I realized there was too much space between my frames, about four inches. Two and a half inches ended up being better.
I also found that it’s difficult to drill exactly on the marks. This might just be because I’m not very good with tools… but I found it to be difficult.
Second attempt: Command Universal Frame Hangers
I love Comand hangers. I love that they’re forgivable. I’ve used them before to hang a gallery wall for my Mom and they worked great. But this was my first time using their frame hangers. Usually, I just use the strips directly on the frame but there wasn’t anywhere to stick them on mine.
I did appreciate that these were forgiving. After my first attempt, my faith in the project was restored after using my new measurements and adjusting the spacing. I also loved that I could slide the frame hanger to help offset if the Command hangers were a little off. I found that using the single hanger required a little extra support to keep it hanging level. I used Gorilla Glue Wall Mounting Putty on the bottom corners.
What went wrong?
They keep falling off my wall. At the time of writing this, two have come down, one almost on my head. I don’t think the frames are too heavy, the hangers are rated for 8 lbs. and the frames are about 4 lbs. I may be doing something else wrong but frankly, they’re not safe and my confidence is shaken.
MY NEXT Idea
Next, I think I will try CLAW Drywall Picture Hangers. They have spot markers and I hope they’ll help me get things in the right place once and for all. I promise to update you when I finally have a success story.
DIY Oversized Mat Gallery Wall
Despite the fact that I’m having a hard time when it comes to getting my oversized mat gallery wall hung… I still LOVE my frames and know it’s going to be gorgeous! For the few days that the command hangers held, every time I caught a glimpse of my wall I’d just smile. It’s absolutely everything I wanted and the perfect way to display pictures of my family in my home.
Use this link to shop Frame It Easy and get 10% off through May 5, 2023.
Ready to upgrade your family gallery wall? I’d love to help you get started. Book now or contact me to get started.